
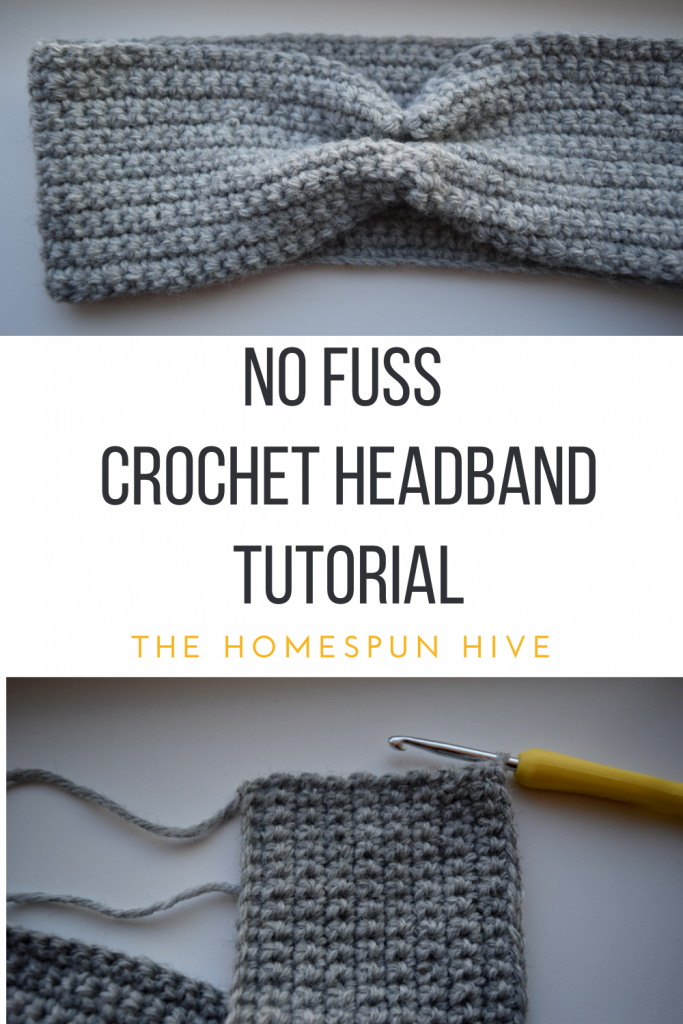
A simple crochet headband easily customizable for all sizes, perfect for a beginner.
Ok, I have to level with you first off here, this no fuss crochet headband tutorial is not an actual “pattern” per say…
Hang with me for a second though!
Haven’t you ever sat down to read a crochet pattern only to find out that you don’t have the exact yarn or hook size to complete it? How annoying is that?!
Well this is not that type of “pattern”.
Or maybe…
You are the kind of person who really needs a stitch count and EXACT instructions every time to create something with yarn. Well, this is not that kind of pattern, friend.
If you are that kind of person, I challenge you to move outside your comfort zone. Trust yourself and let your creativity flow!
Once you try this method for making a no fuss crochet headband and you see how easy it is, you’ll be able to look at your yarn stash with a renewed sense of purpose!
Pin this no fuss crochet tutorial for later!
I’m going to give you instructions on how to create a no fuss crochet headband that actually is no fuss.

You see, I’ve been using this method to create comfy cozy headbands that keep ears warm for the last three years!
I just wanted to be able to sit down and make something without having any complicated stitches that I needed to look up or required a trip to the craft store for a specific yarn size. If you’re anything like me, you have a closet stash of half skeins of yarn begging to be used as it is…the goal is to use what you already have!
Tried and true, this little “pattern” comes through every year that my ever growing kids need something to keep their heads warm. Or when I need something cute to throw over those fly away postpartum hairs that manage to stand up on edge the second there is moisture in the air (can I get an amen?).

So friends, grab some yarn, any size! And grab a crochet hook, any hook that is practical for your yarn. By this I mean, don’t use a jumbo sized hook for some very light weight yarn or vice versa here.
Let’s create something unique!
Materials needed for a no fuss crochet headband:
Any weight yarn
Scissors
Any corresponding crochet hook
Yarn needle (optional)
No fuss stiches you’ll need to know:
- Single Crochet
- Slip stitch
Alright, here I am using a light weight yarn from Lion Brand (weight #3) and a Boye size G crochet hook. Like I said above, use common sense here with yarn and hook sizes that you have on hand.

Firstly, create a foundation chain (leave 4 to 6 inches of yarn hanging from your first stitch, you’ll need that at the end) that comes almost around your head completely. Take one end piece in each hand and wrap this chain around your head. You should end up with your hands in front of your forehead.

You want to leave about 1.25-1.5 inches of space between the ends. Pull the end pieces snuggly, as snug as you want the headband to end up fitting. Remember to leave that 1.25-1.5 inches between ends. Its best to air on the side of making your headband too short, as at the end I will go over how you can add length if this ends up being the case.
Once you are satisfied with the fit of that foundation chain, add an extra chain and turn your work.

Now, simply swing the tail end of your work to the opposite side.
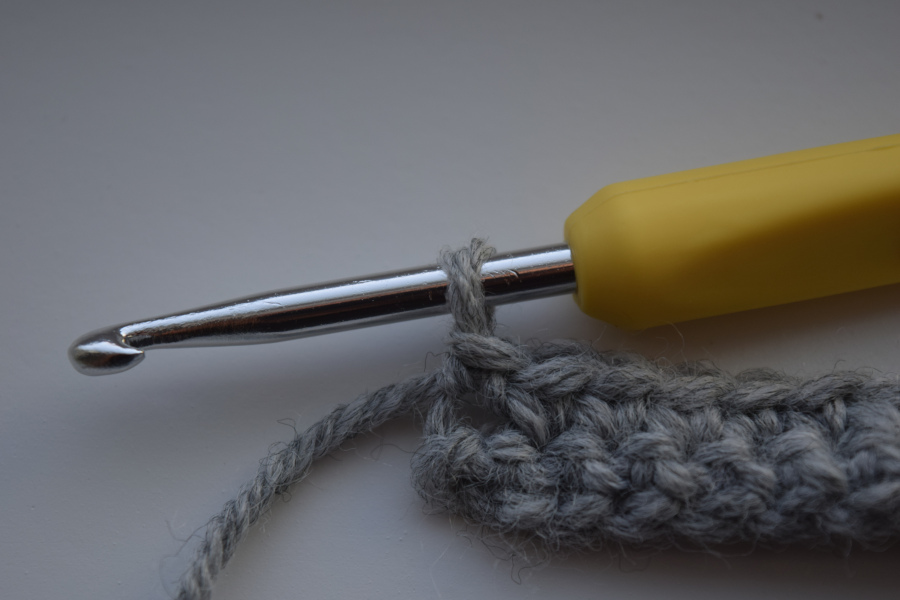
Taking care not to go into that last turning chain you just made, work into both loops a single crochet.
Continue to work back and forth in this manner until you reach your desired thickness of the headband. The headband pictured here is 3 inches thick. Its really up to you on this preference, I look for something to cover the majority of my ears but you may want something more bulky.

Fit Check!
Now that you have completed the headband this far, it is wise to check the fit. If it is too small, simply round the corner at the end of your row and add a one or two more rows on the short end of your headband.


If your headband is too big, simply over lap one end a row or two higher on the next step. Although this has never happened to me, it should do the trick to get a good fit.
Continuing on…
Next, you will take the ends of your headband and sandwich them together.

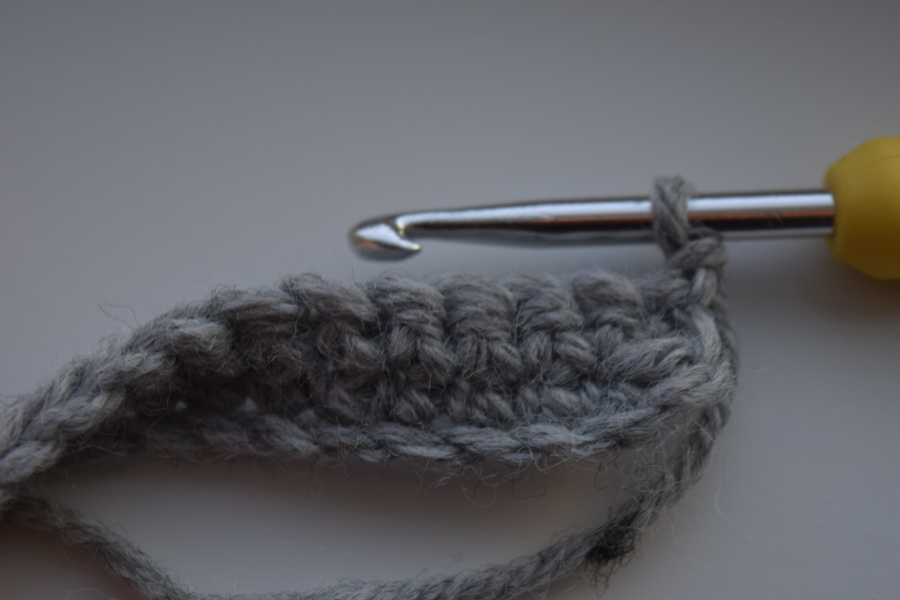
Insert your hook through both layers and make a slip stitch. Do this all the way across the ends.
You should end up with a seam that looks like this:

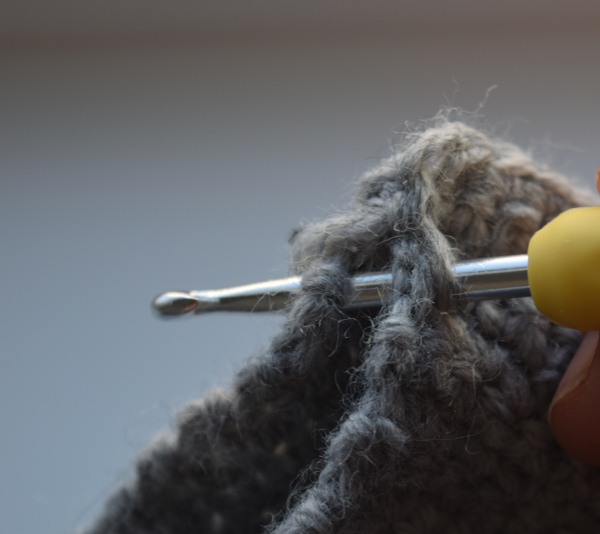
Now just cut your end (leave about 6 inches in length) and send it back through your working loop like so-
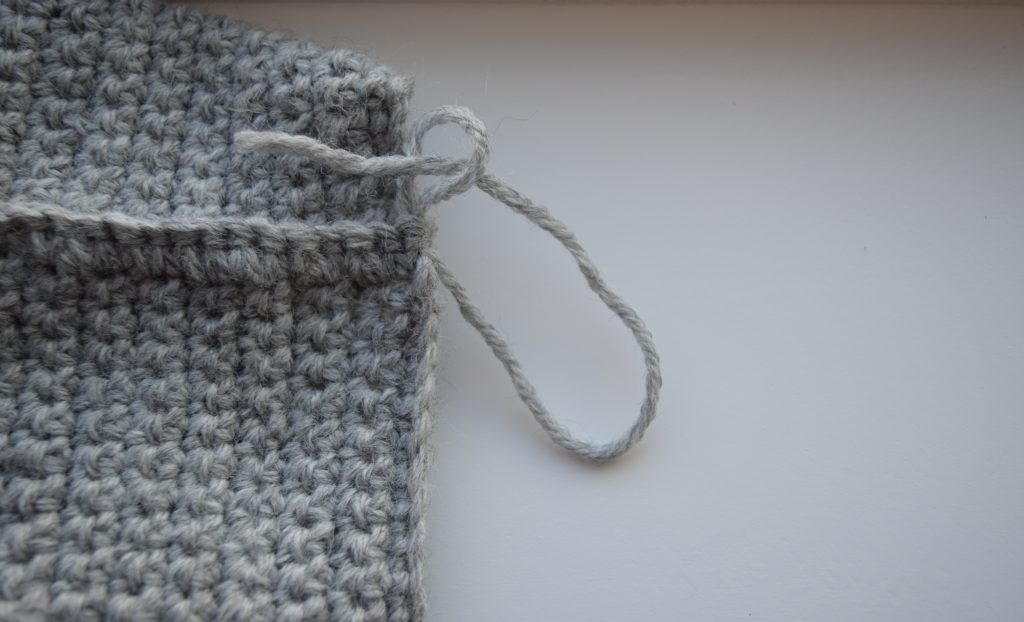
And pull it tight.
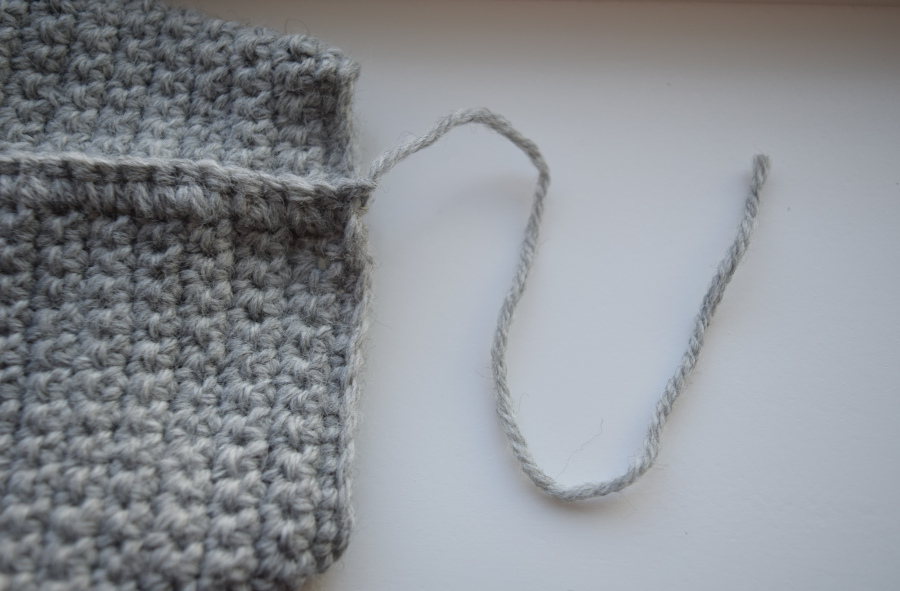
Using your crochet hook or yarn needle, weave the yarn back through that seam section. I weave it in and out 3 to 4 times. Experiment with it until you get a look that you like!

Now pull the end of that yarn nice and tight. You should get an accordion fold look. I call it a cinched look.
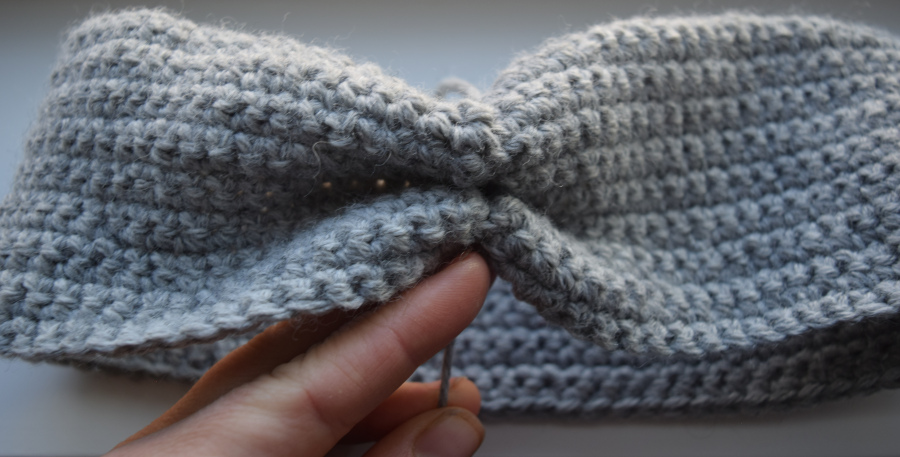
Turn your head band inside out and use the other free end of yarn (from your first stitch) to tie a tight knot. Then trim those down short.

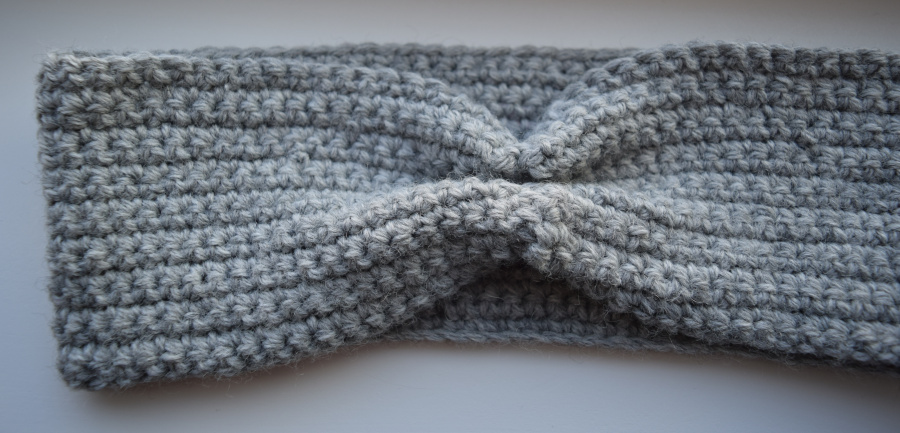
And there you have it, all finished.
Variations
I have cinched this type of headband before and then added a nice big wooden button. Super cute and cozy looking.
Bulky yarn is really sweet and works up very quickly as well.
On my daughter’s crochet headbands I have also added a contrasting band of yarn over the cinched section. It adds a cute turban type style.
When using the single crochet stitch to work the headband, you can go into the front or back posts to achieve a different look vs. the both loops method I used here.

Now go make something!
I hope this inspires you to look around at the materials you have on hand and make something unique and lovely. Don’t forget to tag me @thehomespunhive on Instagram so I can see your version of this headband!
I love my headband. It comes in handy on cold and windy days up here in the mountains!!
So glad you like it <3 🙂