
Fermented feed for your chickens, what?! Yes, fermented feed for your chickens! Cut your feed bill in down, less chicken poop to clean up and happy healthier chickens! Read on to see the how and more on why.
We just got our first little flock of chicks this week! Eek! So sweet and silly to watch. I did a ton of research and reading on everything from sick care to best chicken coop builds to the best feed for those sweet little fluff balls. And the one thing I was seeing pop up sporadically was fermented chicken feed!
My interested was piqued. I love fermenting sauerkraut and soaking our grains but I never knew you could ferment chicken feed!

So, I may not have a whole lot of experience feeding chickens yet, but I have done my research and have a batch of feed currently fermenting.
I couldn’t NOT share this valuable (in more ways than one) information with my fellow chicken lovers, in case anyone wasn’t aware of the fermented feed methods!

As an Amazon Associate, I may earn a small commission from any links you choose to purchase from on here with no extra cost to you. Read more here.
So, why should you feed your chickens fermented feed?
Many reasons, friends! Lots of us know by now that fermented foods (yogurt & sauerkraut are a couple of good ones!) are amazingly healthy to add into our diets. Why would we go through the short and easy process of fermenting our chicken’s feed?
Firstly, when feeding a fermented feed, your chickens will on average eat about half as much as they do their dry feed. This is because their little chicken bodies will be able to digest and utilize the feed more effectively.
Cha Ching! I don’t know anyone who wouldn’t appreciate saving a few dollars here and there.
With better digested food will also come better gut health. And with better gut health you also get an awesome boost of the immune system! Who doesn’t want healthy birds?!
And if you’re feeding less, then that will mean less poop to clean up too!
Secondly, the anaerobic process of fermenting the feed will vastly increase its nutrient quality. Fermenting will add probiotics as well as reduce the anti-nutrients known to be in grains and seeds (Sally Fallon Nourishing Traditions and Weston A. Price lovers know this!). This will allow the availability of minerals and vitamins (mainly B vitamins) that are in the feed to actually be used by your birds.
Studies have shown that hens fed fermented chicken feed even lay heavier eggs! Thicker shells, glossier feathers and happier birds overall. Sounds like a sweet deal to me.

A little information disclaimer here…
Now, some studies oppose this information that I stated above and some support it. Not only am I going not only off of studies but off of many first hand accounts of very experienced chicken keepers. I would take the words of some one who loves their chickens a little more heavily than a company who’s bottom line is to make more money off of their customers…thats just my own little opinion.
I encourage you to take everything with a grain of salt (wether that be information from scientific studies or first hand experience) and just give it a try for yourself and see how it goes.
Here’s my video on fermented chicken feed too!
PIN THIS FOR LATER

How do you ferment chicken feed then?
Here are two methods! Lots of chicken owners tweak things slightly but these seem to be two common methods out there.
Method #1- Backslopping
Step 1: Choose a clean container
Your flock size will decide how big of a container you will need for the job.
Some people with over 15 birds like to use a food grade 5 gallon bucket like this, while many others don’t mind doing smaller batches in half gallon mason jars like these.
I myself, with just six little chicks am using one of these wide mouth quart jars for now.
Aim for glass, ceramic or BPA free plastic.
Step 2: Add your feed
I would not add more than half the volume your jar can fit. Your chicken feed will absorb water and swell, and also bubble up. So, you’ll need some extra head room at the top of your container for that expansion.
Step 3: Add non chlorinated water
Add enough water into your container to cover about half an inch over the top of the feed. Then go back and check it in a couple hours and add more water as needed to keep that half inch or so buffer.
If all you have is tap water, I would still try it, I have read that others have success with it.
Step 4: Wait
Add a loose fitting lid to your container and wait 2-4 days. Stir once a day or every other.
Use a covering that will sufficiently keep any possible mold spores or other contaminants from floating on in through the air.
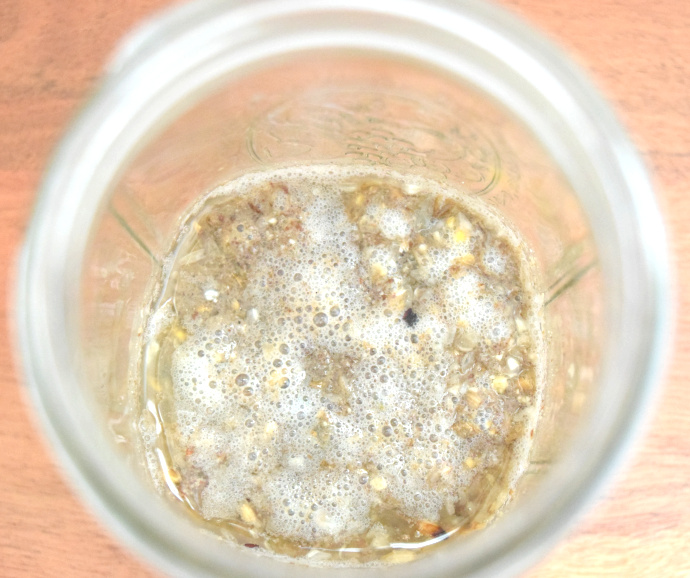
Do not completely close the lid on your container! The process of fermenting creates gases that need to be released ( you’ll see evidence of that when your feed starts to bubble) and if there is no where for those gases to go, your container may burst.
Step 5: Feed your chickens
Scoop some feed out and add it to a bowl or shallow dish. Only feed an amount that will be gone in about 30 minutes.
For us right now, this looks like adding a little feed into a plastic mason jar lid to the chick’s brooder. I have seen many owners just use a medium sized bowl for their flock.
Some people like to feed fermented food in the morning and then leave a container out the rest of the day with dry feed in it too. Others like to feed fermented twice a day (morning and evening). And some chicken lovers just feed fermented feed when they get a chance to supplement it in.
The choice is yours!
Step 6: Add more feed to your container (backslopping)
Replace what wet feed you dish out with fresh dry feed into your fermenting container and stir it a little, replacing the loose fitting lid.
If you are familiar with sourdough bread and the process of using a starter then this won’t seem so new to you.
Your feed should be fermented by the following day and ready to use!
You shouldn’t need to start all the way over from step 2 unless you empty your fermenting container completely.
Method #2- Staggering
Essentially the same process but with a staggered approach.
Start a batch with enough feed for one or two days with a clean jar, add your water and loose fitting lid and let ferment. The following day add another clean jar into the rotation and let it ferment. By the time the first jar is done, your second jar will be ready for use.
The main difference is that you aren’t leaving a “starter” amount in a container and adding to it. You are starting with fresher batches, some people who use this method ferment for only 24 hours.

Additional tips-
The temperature of where you store your feed container will affect how fast it takes to finish fermenting. Don’t over think it, just keep in mind that if it’s colder, it’ll take longer and if it’s hotter, it’ll take less time to ferment. If you aren’t sure if the feed has finished fermenting, just use it. Soaked feed is beneficial too!
If you find mold or anything fuzzy on your feed after fermenting, throw it out and start over!
If you see a white film on top of your fermented feed, its not mold. It is a type of kahm yeast. Simply scoop it off or stir it back in.
Smells may be off putting but your fermented chicken feed should not smell putrid. I’ve found that ours has an almost fruity or bready fragrance to it.
We use scratch & peck organic feed, the link will take you to their adult feed mix even though we are currently using their chick starter.
A great online source for learning about chickens and fermented feed is backyardchickens.com! I also own this interesting book called The Chicken Encyclopedia, its a good read to get some basic facts with tons of pictures!
I hope this helped you learn a bit about how & why you can and should add some fermented chicken feed into your flocks’ diet! Whether you want to add it as a small supplement or use it replace entire meals of dry feed, I think it will be very beneficial for your birds!
Do you use fermented feed for your flock? I’d love the hear about it in the comments below!
Love this idea! We have tried something similar with our chickens and they loved it!
Cool! Chickens are so fun!