
Learn how to make these easy DIY wooden tactile number cards inspired by Montessori math lessons with materials you might already have at home.

We are slowly leaning more towards a Montessori inspired style of learning for the girls.
I started in on a more traditional method of homeschool preschool curriculum for Ellie this year. The first week went well but after that she started to resist. And I wasn’t going to push it.
After all, this is our homeschool journey, I want to work with the girls and figure out what learning method works best for them.
First it was the letters.
Ellie knew a few letters and the ABC song but besides that, nothing really seemed to stick. The memorization of the alphabet, the way it is traditionally taught didn’t seem to be working for her. I wasn’t too worried, all children learn at different paces.
The same thing was going on with numbers. Ellie could count but as far as recognizing numbers or understanding that those numbers correspond with a quantity, it was a little over her head at the time. And preschool worksheets were not helping.
But I did wonder if she just needed to be taught differently.
Montessori style learning looked really attractive to me. The simplicity, the natural materials, the practical life lessons…the beautiful Instagram accounts made me drool.
I scoured quite a few accounts and read some blogs. I was ready to give Montessori a try but it seemed really overwhelming. Where to start? What materials do I actually need? Is there some kind of written curriculum I could follow?
I needed an outline to follow, more structure!
I followed an account on Instagram run by a woman named Jennifer O’Steen, @ModernClassicalHomeschool and she shares a lot of simple to do activites for kids. She also has a shop that sells printables and educational things like that. We purchased her pin poking print outs and the kids really liked them!
Bonus- she was really easy to talk to!
I am the kind of person who asks a million questions and makes simple things usually very difficult. Oops, haha.
I asked Jennifer if she could point me towards a simple and straightforward Montessori based math curriculum. And what do you know? She actually had one in her shop!
It hit all of the marks I was looking for; inexpensive, straightforward and the materials needed were really simple!
So I purchased and downloaded the math guide
Uh oh, the materials were simple BUT I didn’t have them! I could easily purchase them on Amazon, no problem.
But I realized that we could totally make them at home ourselves for a very low cost, if any!
I had previously made a paper version of “sandpaper” cards for letters and found that adding in a sensory experience for Ellie was a sure fire way to help her absorb and learn the material. So I knew we needed to do this for the numbers as well.
But this time, make them a little more durable.
We are blessed with a plethora of wood scraps and wood working tools. So Brian and I put a plan of action together to make these wooden Montessori inspired “sandpaper” cards.
Here’s what you’ll need:
- Measuring tape
- Pencil
- Quarter inch plywood (we used a small portion of a 4×8 sheet)
- Table saw
- Chop saw
- Sandpaper
- Polyurethane
- Paint brush
- Steel wool
- Glue
- Small paint brush
- Glitter or other abrasive material like fine sand
*If you don’t have a table saw or chop saw, you can easily go to your nearest hardware store and ask them to make these cuts for you.
How we made these Montessori inspired tactile number cards:
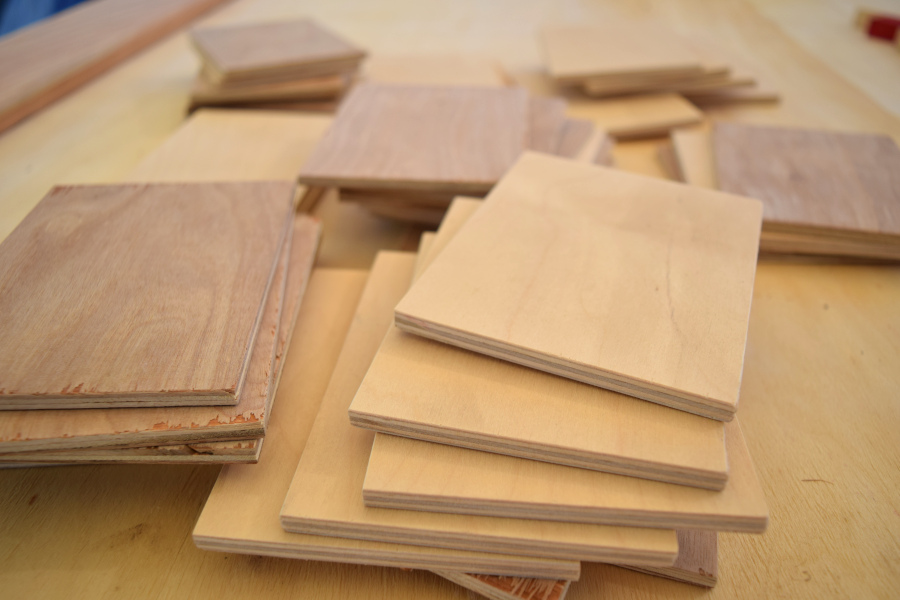
First we measured out how big to make the cards, we chose to make them 3.5″ x 4.5″ big.
Using a table saw, Brian ripped a large piece of quarter inch plywood into 3.5 inch wide strips.
Next, he used a chop saw to chop those long strips into 4.5 inch long sections.
Then I used 150 grit sandpaper to sand down those cards, smooth over the edges. No splinters here kids!
Then we got out the polyurethane and larger paintbrush to coat the cards over on each side.

This is technically optional, but adding the polyurethane makes these cards wipeable should they get smudged or dirty…and you know they will because they will be handled by the kids.

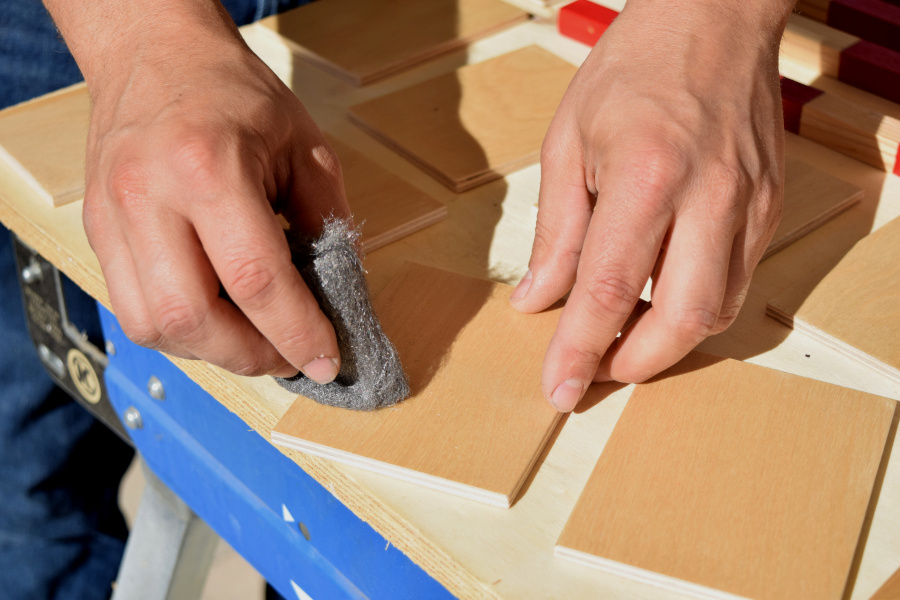
Adding that clear coat of polyurethane is going to cause the grain on these wood cards to become raised, so after some dry time, Brian used steel wool to smooth those back out.
Now for my favorite parts!
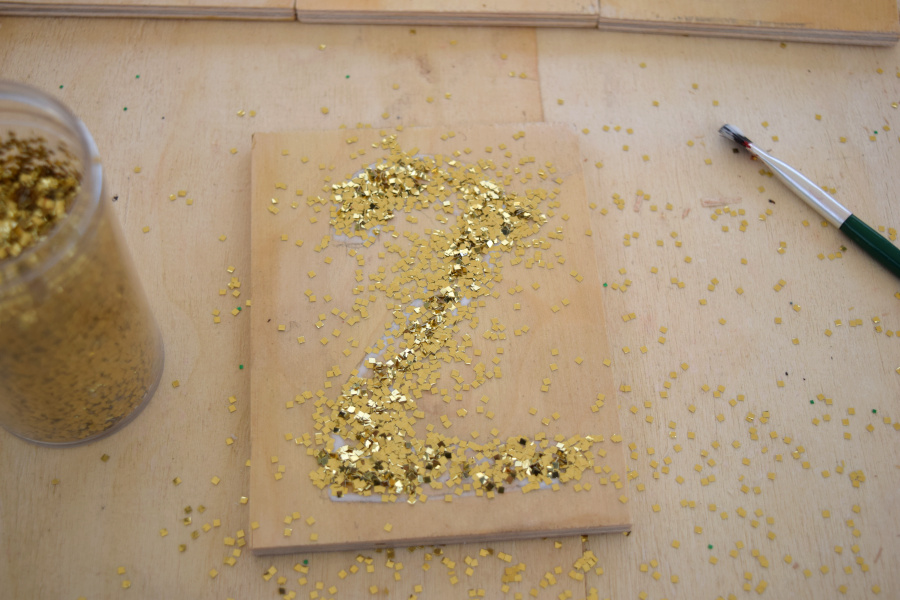
At this point I pulled up a few pictures of Montessori sandpaper cards on the computer to take a look at fonts. I found a simple one to follow and using a pencil, lightly drew the outline of numbers on each card.

Next I pulled out the smaller paintbrush, liquid glue and glitter.
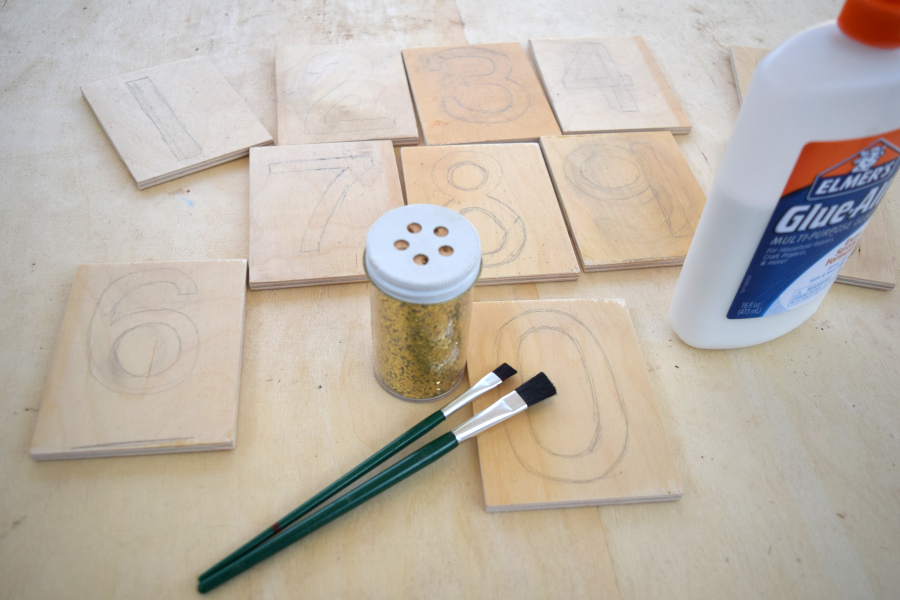
Of course this is when the girls ran right over. No chance at using glue or glitter without them wanting to be involved!

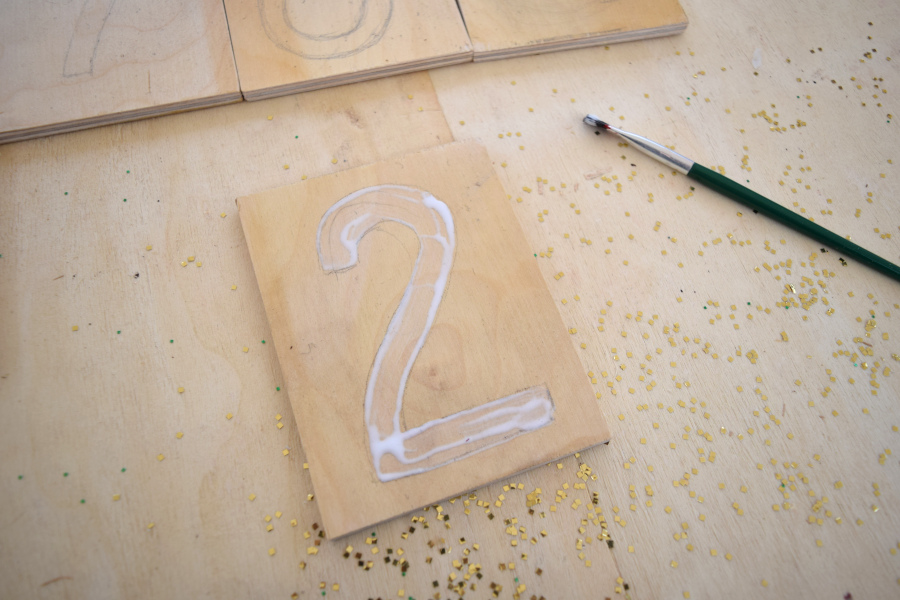
Using that smaller paintbrush, I painted the glue around the number outline that was drawn on the card.

The trick here is to use less glue than you would think you need. I really wanted the numbers to be as flat as possible on the cards.
I then added glitter to the card with the glue.

After sprinkling the glitter on, I tapped the card and shook it around a bit to get as many stray pieces of glitter stuck to the glue as possible. Then I gave the wood card a good tap on the table to get the rest of the glitter off.

Tada!
Paint on the glue, add some glitter and repeat until all numbers are done.
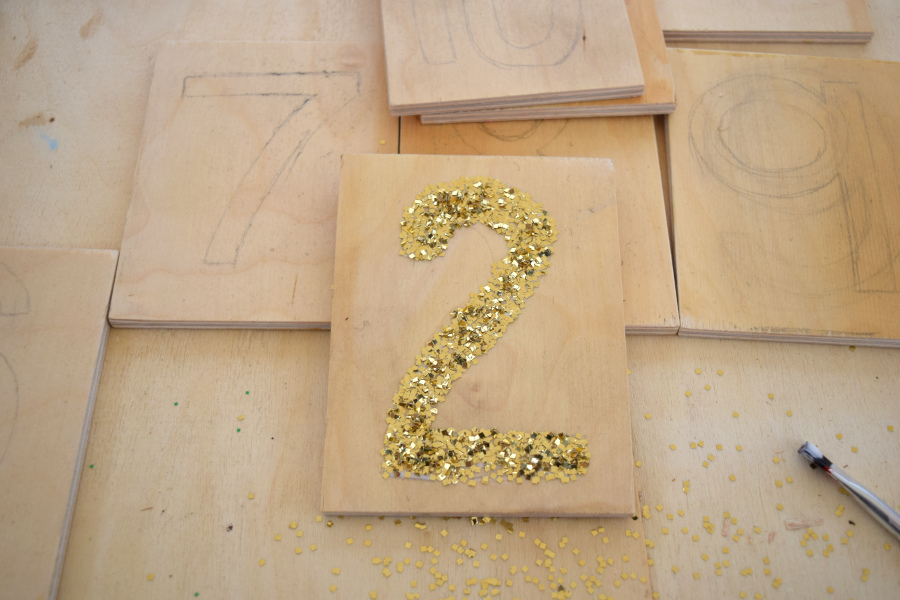
I let the glue on those cards dry for the rest of the day and then came back and added an additional coat of polyurethane over the top to keep as much of that glitter on the card and out of the house as possible.
One of Brian’s biggest peeves is glitter trailing through the house, haha. Good luck with that dude, you live in a house with three girls 😉
And there you have it, how to make these DIY Montessori inspired tactile number cards!
I hope this inspires you to make your own homeschool materials!
Pin this for later!

I love a good diy that saves me some pennies. ☺️ Thanks for sharing.
Yup! Saving pennies AND using glitter, cant get much better than that lol
This is amazing. I have a 2 & 4 year old who would benefit immensely from letters/numbers made like this.
On the contrary, I am the only female in my home (aside from my chickens) and we have a “glitter free house”…. yeah right!! Bring on the glitter.
Thank you Megan! & YES! I made these primarily for my 4 year old but my 2 year old is catching on with them as well. I agree, bring on the glitter, its much more fun to look at than sand lol